
[Blender] How to apply array modifiers to grids and clone along circles and curves
Blender Array Modifier allows you to duplicate an object while keeping it in a fixed position and is a very useful tool for creating stairs and fences. If you want to make a curve like this, you can't create it if you just use the standard tools.
.jpg)
However, by combining several objects and modifiers in addition to the array modifier, you can increase the number of objects that could only be arranged in a single row in a grid, place them in a circle, or create them with curves (splines). can be placed along the shape.
Blender array modifier is explained in detail in " Let's use the array modifier to increase the number of objects! " It may be good.
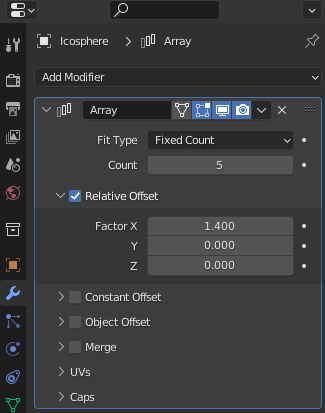
arrange in grid
If you want to clone objects into multiple columns instead of one and arrange them in a square or rectangular shape, simply add two array modifiers.

In this example, we want to place the cylinders in a "5 x 5" square grid , so add an array modifier to the cylinder added to the viewport, set it to "Specify a constant ", and then select " Number :5 " to make 5 cylinders.
It may be a good idea to rename the modifier to " Row 1 (1st column) " to make it easier to understand.
Then add a new array modifier and set it to " Number: 5 ". If left as default, they will be arranged in the X-axis direction, so it's a good idea to enter a number in " Y " to make it grid-like. I also changed the name of the modifier to "Row 2-5 (2nd-5th row)" to make it easier to understand.
arrange in circle
In the case of a grid, it could be implemented simply by adding an array modifier, but in the case of a special shape such as a circle, it is necessary to combine an empty (null object) and a parent (parent-child relationship). First, add the base object to the viewport and adjust its position.
Next, place the origin (anchor point) of the object at the center of the circle. When doing this, it is best to work in the center of the world. By the way, I used a 3D cursor to move the origin this time.

Now add an empty to the center of the circle. Changing the scale may not work well, so it is better not to change the size of the empty object, or to " Apply: Scale " after the change. Also, if you change the scale of the object, please do "Apply Scale" in the same way.

Apply the array modifier to the object to be cloned, enter " Specify by constant " and " Number ", uncheck "Offset (magnification)" and check " Offset (OBJ) ".
Next, drag and drop " Null-Rotation " to " Object " in " Offset (OBJ) ". Nothing will change as it is, but if you operate the rotation in the Z-axis direction of "Null-Rotation", the object will rotate once.

his time we want to make one turn exactly, so select " Null-Rotation ", enter " 360/12 " in " Rotation: Z " in the transform panel (shortcut: N), and arrange it at an even angle. make sure to
After that, while holding down the " Shift " key in the outliner, select the objects in the order of "Null-Control (parent)", "Null-Rotation (child)", and "Cylinder (child)", and right-click the viewport " Use the shortcut "Parent", "Object" or "Control(Command) + P" to apply the parent.
When operating in the viewport, select from child objects, so select "Cylinder (child)", "Null-Rotation (child)", and "Null-Control (parent)" in that order, then apply the parent let me try.
Then, the two objects are stored in "Null-Control", so you can easily adjust the position, etc. just by manipulating the Null-Control object.
summary
Blender's Array Modifier is Cinema 4D Cloner, but if you use several modifiers and empty like this time, you can do more complicated arrays, so you can operate it. It's a good idea to master it and try to do complex modeling.


Comments